
General navigation
There are several ways users can navigate the scene:
- Movement: Using WASD the user can move around in the scene – W: forward; A: left; S: back; and D: right. Users can also use Q to move directly up, and E to move directly down. Using SHIFT+WASD will increase the movement speed allowing users to cover larger distances.
- Rotation: Holding the right-mouse button will rotate the view while keeping the same position. Holding ALT+right-mouse button will orbit the view around the current focus, enabling the user to rotate around an object while keeping the object in focus.
- Zoom: Using the scroll wheel users can zoom in and out of the current view.
Camera gizmo
The Procedure Builder also offers a camera gizmo located in the top-left corner, allowing users fine control over the view:
- Axis-aligned view: By clicking one of the cones (x, y, or z), the user is presented with an axis-aligned view of the scene.
- Perspective view: This is the normal view where the scene is rendered in normal perspective, where objects further away appear smaller.
- Orthographic view: This is a special view where the scene is rendered “flat” without any perspective. In this mode, rotation is disabled, always offering an axis-constraint view. This mode is very useful when aligning objects precisely. Users can switch between perspective and orthographic view by clicking the label under the camera gizmo, or by clicking the cube in the center of the gizmo.
- Info: Clicking the small light bulb launch the Knowledge Base overview of Procedure Builder articles.
Object focus
It is possible to get objects into focus by double-clicking the object in the Object panel or in the Steps panel. On subsequent double-clicks, the object will stay in focus but switching between two different zoom levels. The same object focus can be achieved by pressing the ´F´-key.
Object interaction
When hovering over an object in the "Scene objects" list, the correspondent instance is highlighted in the 3D scene for easy identification. The same happens when hovering over an object used as a target in the steps list, the correspondent instance is highlighted in the 3D scene for easy identification.
It is also possible to select an object in the 3D scene by clicking it with the mouse. Doing this while in the "Content" tab will select the instance clicked and show a 3D gizmo allowing the user to adjust the initial position/rotation of the instance. Selecting objects in the 3D scene while in the "Steps" or "Events" tabs will highlight the corresponding instance in the Scene Objects list for easy identification. Clicking the same object multiple times will traverse down through the object hierarchy making it easy to select sub-components of the object.
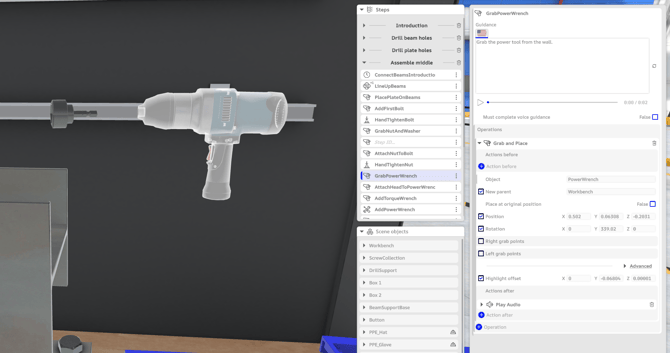
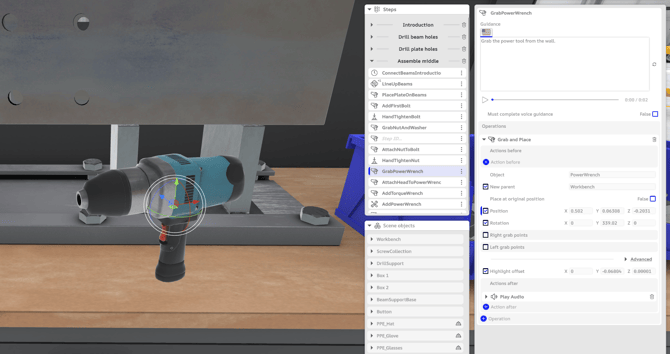
When an object is used in an operation where the postion, rotation and/or scale can be adjusted (e.g. the position of a Grab and Place operation), a 3D gizmo allows the user to adjust these value easily:
- X-position: grab and drag the red arrow
- Y-position: grab and drag the green arrow
- Z-position: grab and drag the blue arrow
- X-rotation: grab and drag the red circle
- Y-rotation: grab and drag the green circle
- Z-rotation: grab and drag the blue circle
By pressing "X" users can switch between global and local space rotation.
As an alternative to using the 3D gizmo, users can click-and-drag on the labels for e.g. x, y, and z position to adjust the values. Users have the following options to further customize how to change values:
- When pressing SHIFT while dragging the changes are bigger
- When pressing ALT while dragging the changes are smaller
- When pressing CTRL while dragging the changes are whole-numbers (integers)
Camera shortcuts
The SynergyXR Procedure Builder support several keyboard shortcuts allowing even faster interactions:
| General camera | Effect |
| Ctrl+X | Cut selected item |
| Ctrl+C | Copy selected item |
| Ctrl+V | Paste into selected item |
| Ctrl+D | Duplicate selected item |
| Ctrl+Z | Undo |
| Ctrl+Y | Redo |
| Ctrl+Shift+Z | Redo |
| X or / | Toggle local and global gizmo orientation |
| C | Toggle collider visibility |
| Ctrl+F | Open search |
| Escape | Close search |
| Camera placement | Effect |
| F or . | Focus on selected object |
| Home | Focus on all content |
| + | Zoom in |
| - | Zoom out |
| 0 | Reset view to initial position |
| 1 | Front view |
|
Ctrl+1 |
Back view |
| 3 | Right view |
| Ctrl+3 | Left view |
| 7 | Top view |
| Ctrl+7 | Bottom view |
| 5 | Toggle perspective / orthographic projection |
| Camera orbit |
Effect |
| 4 | Rotate camera left |
| 6 | Rotate camera right |
| 8 | Rotate camera to look down |
| 2 | Rotate camera to look up |
| Camera pan |
Effect |
| Ctrl+4 | Pan left |
| Ctrl+6 | Pan right |
| Ctrl+8 | Pan up |
| Ctrl+2 | Pan down |
Note: Number keys work with both the numpad and the top-row number keys.