How to create a 3D scan and use it in virtual reality using SynergyXR?
In this tutorial we will set you up with the basics of how to create a scan using either phone or 3D camera. As time goes by we will be adding tips, tricks and experiences as do's and don'ts unveil themselves. Don't hesitate to reach out if need be.
Applications and hardware
3D scanning hardware
For now we have tested the LiDAR sensor on newer iPhone devices like the iPhone 12 and iPad Pro from 2020. But we would like to test even more gadgets out there. We have, however, found that the Apple products are more than capable of creating very useful scans in a fast and reliable fashion.
3D scanning applications
When it comes to the applications needed there are plenty out there. In this tutorial we have listed two we have tested and found functional. But when it comes to mobile devices and tablets we are somewhat limited to the number of devices that have the LiDAR sensor. Therefore, we wont go into actual 3D scanner devices but rather, for ease of use, talk about what you already carry around everyday; your phone or tablet.
Polycam
They write: “Fast and accurate 3D scanning app uses the LiDAR sensor on the new iPhone 12 Pro to rapidly create dimensionally accurate color scans of objects and places.”
They write: “The app uses the devices’ LIDAR sensor along with the camera to build a realistic textured 3D mesh of an object or space. The 3D mesh is constructed through an interactive UI that shows a user what information is being captured and yields an immediate low-res photo texture preview.”

They write: "Scaniverse lets you capture, edit,
and share 3D content directly from your phone.
Using LiDAR, it builds 3D models with high
fidelity and stunning detail."
Actual scan
When doing the actual scan it is as simple as using a video camera function on your device. In this case we used the 3Dscanner app on an iPad pro as an example.

Make sure that all tiles turn from green (or whatever color your app of choice shows as unscanned areas) to neutral, but do not spend too long on being precise. Being overly thorough will at best increase size, but at worst confuse the apps scan. Scan an area or object once and move on in a methodical manner. But experiment with it and find what works best for you.
Exporting the scan
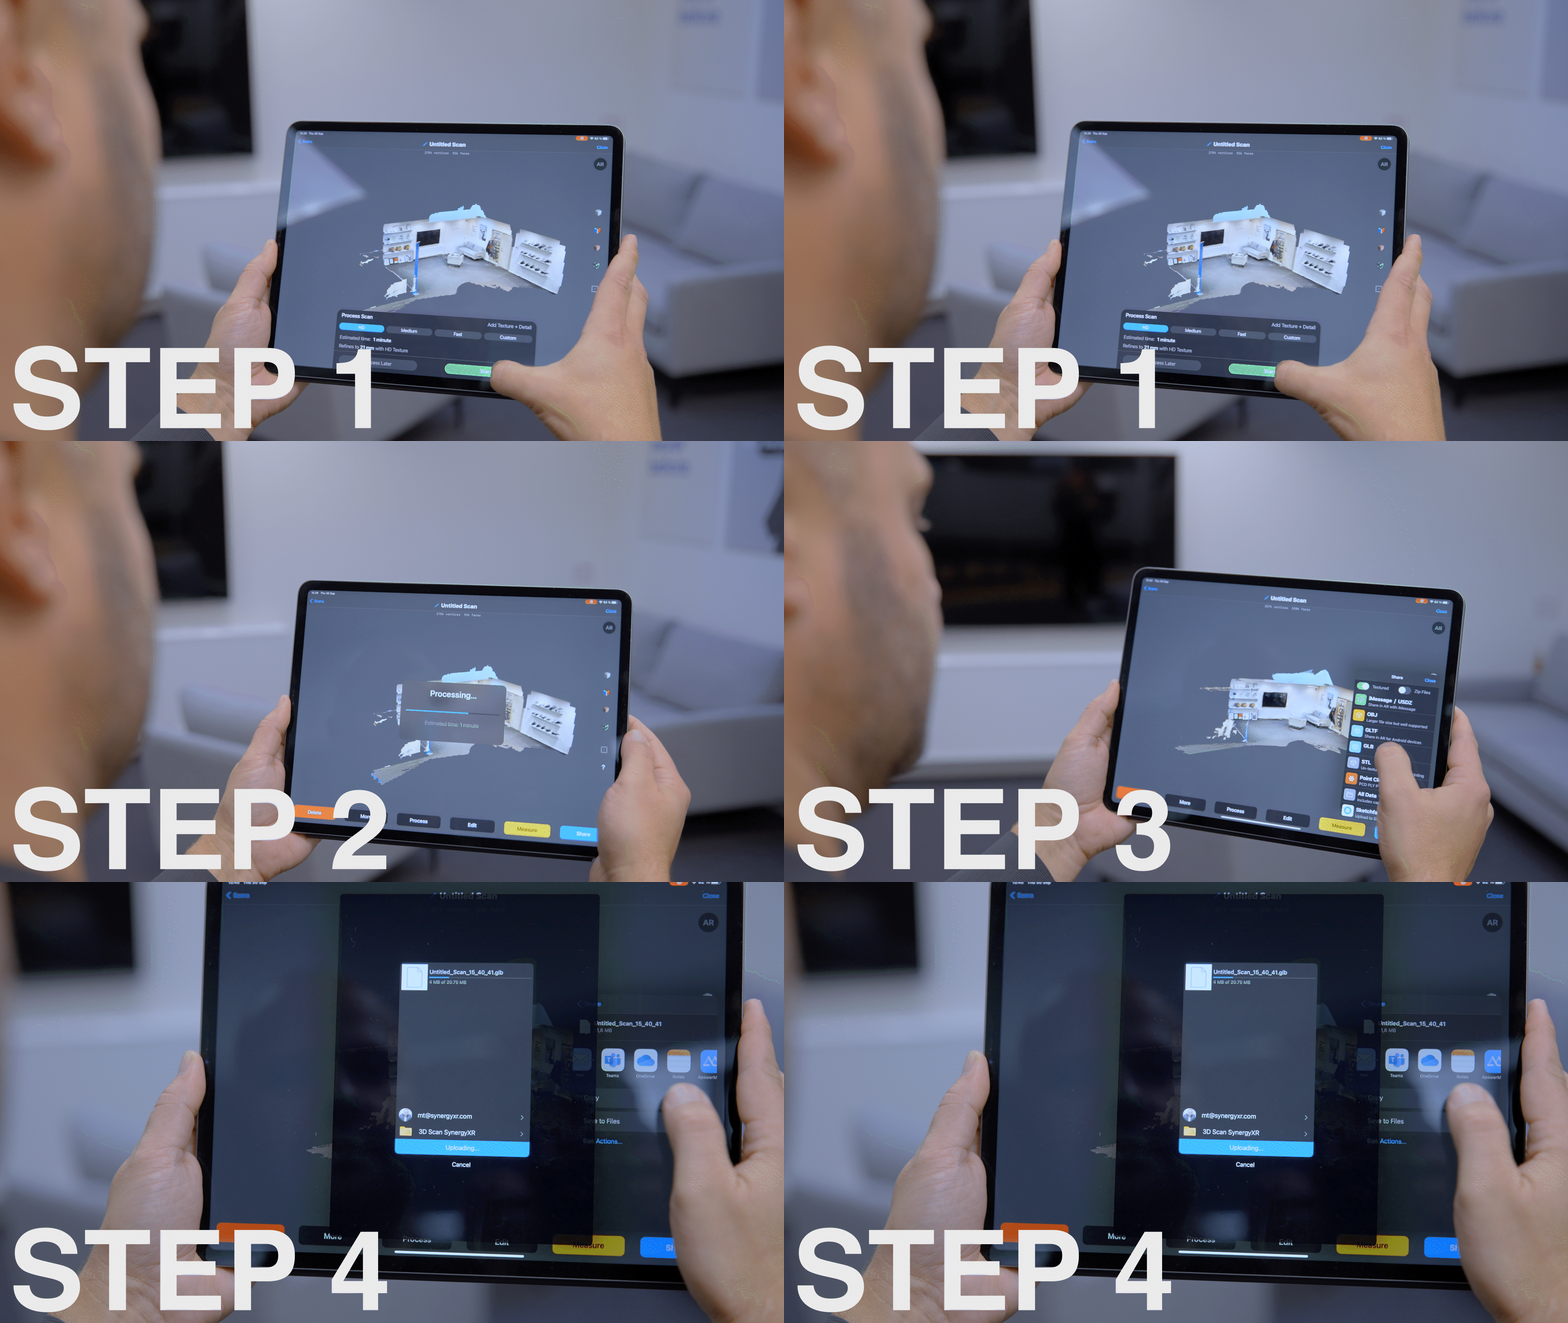
In the following GIF you can see the steps taken to export and share the scan you have just created. We share using OneDrive, but feel free to pick what ever solution works for you in your work flow. The steps are
- Press start
-
Wait for processing (1 minute in this case)
-
Choose filetype
-
Choose your desired way of sharing

When exporting the scan make sure to export it as a .glb file. This type is recognized by the SynergyXR platform. The two applications mentioned in this tutorial are both capable of export this file type.
Upload to SynergyXR
Now, just share the file with the SynergyXR app for iOS to upload the scan.


